Hello my lovely foodies!
This is just a post to inform you that I will be leaving Blogger and Honeytops and changing over to The Last Slice on Wordpress!
Why, you may ask?
I feel I have changed, since starting Honeytops and Wordpress gives me a more "grown-up" feel!
I hope you will check out my new and improved (well, at least I think so) blog! I look forward to you commenting and being your usual, supportive and encouraging selves :)
Don't be strangers!
Sunday, January 23, 2011
Monday, September 6, 2010
Farewell, Dressew!

Hey all!
I apologise, summer blogging has been super slow! I'm finally done studying and just when I thought I would get a little bit of downtime, I glanced at my calendar and realised that school starts again, tomorrow! Back to reality!
This year has been full of milestones for me: one of which is my leaving Dressew Supply Ltd. I have been working at Dressew since the age of fifteen...I am now twenty-one! Dressew has been a huge part of my growth and development as a person and I have been so fortunate to be able to work with such amazing staff. I'm also lucky that I've made so many supportive and encouraging friends during my time there!
With all this in mind, I decided it fit to bake for my last day! I made these beautiful double chocolate numbers: chocolate cake with a rich, chocoate buttercream! Just to add a little pizzazz, I added a little fondant flower on each one. They were all gone by the end of the day so I'll take that as a compliment!
 My last day at Dressew was definitely emotional. The owners, R and J bought donuts for all the staff and at the end of the day, the staff gathered at the top of the stairs and applauded and presented me with a beautiful gift and card! It was very sweet (literally and figuratively) and the kindess and support definitely brought a tear to my eye.
In closing, I'd just like to say: THANK YOU, DRESSEW!
I really can't put into words how much of an impact the staff and the experience of working at Dressew has meant to me...so as usual, my emotions came out in the form of baked goods!
Alright, foodies!
Till soon!
Friday, June 25, 2010
Raven's Red Velvet
Hey Foodies!
I woke up this morning, feeling slightly unsure of what the day would bring and unfortunately, not possessing the best of mentalities. Then i opened my window: the trees were swaying in the slight breeze and the sun was shining. I was instantly uplifted. It is days like this that I feel so fortunate to be living in Vancouver. I was instantly in the right headspace to blog!
My latest adventure was Red Velvet! If you've seen my previous blog posts, you may remember me baking red velvet cupcakes last summer - the recipe I used previously was definitely less than perfect. Since then, I had come across a recipe from Throwdown with Bobby Flay and decided to try CakeMan Raven's Red Velvet recipe, which he was kind enough to provide access to, online! This recipe took leaps and bounds from the previous recipe so I would encourage all of you red-velvet cake lovers out there, to give this recipe a try. The way the recipe is laid out is so easy to follow that you'll be making it every chance you get!
The only change I made to the recipe was regarding the food colouring. The recipe calls for two tablespoons of red food colouring - I use gel colours, so I just added the food colouring after the batter had come together until I got the colour I was looking for - as you can see, it's very red but feel free to "say when" before it gets this bright - I think the vibrant red colour just adds to the whimsy of this delectable creation!


Here are the cakes when they came out of the oven. Just a note concerning the baking time of these cakes - it may seem short (only 30 minutes) but rest assured, this is enough time! I have definitely been guilty of overbaking things in the past because they didn't seem "done" - that has lead to a lot of tough cakes. The last time I made the red velvet cupcakes, I think I overbaked them and the baking soda taste really comes out when you do that - so resist the urge to leave them in the oven for "just a minute more"! I may try baking powder next time, since I'm not partial to using baking soda, generally. A quick note: oil and flour your pans, well! My rounds came out, just fine, but my rectangle cake definitely had to be listed as a casualty. I still had enough good cake to work with, but first, do no harm, right?
This recipe makes triple-layer, 9 inch cake. I didn't want to go with a 9 inch since there are only three of us in my house and do we really need to add 9 inches to our thighs? Yeah, didn't think so. So I went with a 6 inch - that's why you see the rectangular cake above, which I just cut a 6 inch round out of.

Now to the best part of the cake - the frosting! I encourage you all to use the exact method that cakeman describes in his recipe. In my experience, cream-cheese frostings can be pretty finicky - they especially tend to become runny, which becomes quite the dog and pony show when you go to ice a cake!
This method seemed to work very well and refrigerating the icing for about half an hour before doing a crumb coat, and then another half an hour before doing the final coat seemed to work quite well in this recipe.
I learned the technique for icing this cake while watching Cakeman Raven do it on Throwdown - he started with a nice, thick layer of icing on the cake, and then with the tip of the spatula, made horizontal lines around the cake. If you have a lazy susan, you can spin the cake, while holding your spatula stationary.
Next, with the edge of the spatula, he made vertical lines up the sides of the cake - this creates the sort of scalloped look you see, here! Super easy and elegant, no doubt.

And finally, here, you see my Southern masterpiece!
I must say, I haven't been this satisfied with one of my own creations in a long while. This cake is so moist and tastes even better right out of the fridge after a couple days.
The longer it sits, the better it gets, so it would be an ideal, make-ahead dessert!
Let me know what you think!
Happy baking, all!
Tuesday, June 15, 2010
Chicka-Cherry-Cheesecake
Hey y'all!
So it was a certain lady's birthday, oh, two months ago...and she never got her birthday cheesecake (yes, that is the kind of horrible, little sister I am). Finally, I coupled her birthday treat with the visit of my wonderful and infinitely kind Mumti Masi and bam: a decadent delight for two equally delightful ladies!

The concoction you see is actually my aunt's recipe! A dense, sumptuous, New York-style cheesecake, topped with a tangy cherry filling.
Okay. So this is embarrassing: I used canned filling. Go ahead, judge me, I can take it. For those of you who have read my post on the cherry pie I make, you'll know: I'm not a filling-making kind of a gal. I've never been that girl, maybe I will be, one day in the distant future. I will make cans of filling between dropping the kids off to soccer practice and pulling my hair out or something. But for now, I modify fillings! I always find that the cherry filling from the can is lacking citrus: the juice of half a lemon remedies that, perfectly.
Sorry, folks! No recipe for this one: family secret! But I hope you enjoyed reading this, all the same.
Just throwing a question out there to all you, foodies: how do you prevent your cheesecake from cracking? Below, you can see that the filling has seeped into the cheesecake (not that I'm complaining!) but that's because my cheesecake always cracks...ideas?

Thanks for perusing this post!
Till soon!
Wednesday, June 2, 2010
Mamma Mia, I'm Switchin' It Up!
Hey lovely people!

First up, you see the lasagna. The sauce was quite a complicated thing. I find that when I make pasta sauce, it's different everytime. Sometimes, I feel like throwing in some olives, sometimes not. Sometimes it's a bit sweeter, and sometimes a bit richer. In any case, I usually start it off with an onion, which I caramelize in the pot. I then add everything else all at once: ground beef that I pre-cook with salt, pepper, garlic, ginger (yes, ginger - you don't taste the ginger...but you definitely notice if it's not there!), basil and oregano, a dollop of tomato paste and a huge can of crushed tomatoes, brown sugar and vinegar and a schwack of fresh basil if you have it. This time, I also added a handful of chopped up olives.

For the salad, use any vegetables and greens you like. I just went with lettuce, tomatoes and olives: go simple, because it's all about the warm, balsamic vinaigrette.
For those of you who know me, you know that baking is my thing...but I LOVE cooking, too! Baking is fun because it's all about chemistry - it's a challenge to get all the proportions of everything right -- and when you do, it's so satisfying! But cooking is different - it's all about improvisation: no balsamic vinegar? Use red wine vinegar instead. And because of all this improvisation, you can tailor your recipes to fit your taste and add your own style and flair. A madeline will generally always taste like a madeline, but two pasta sauces can be completely different!
This year has been a whirlwind so far, testing me and my family for reasons that we cannot, for the life of us, figure out. Being in the kitchen is my solace.
My mum and sister celebrated their birthdays in April and so instead of the usual "let's go out for dinner" thing, I decided to make them an Italian feast. There's just something about a home-cooked meal that beats any restaurant.
On the menu: Lasagna with red sauce and layers of creamy bechamel sauce, garlic bread and a fresh, green salad with my famous warm balsamic vinaigrette.

First up, you see the lasagna. The sauce was quite a complicated thing. I find that when I make pasta sauce, it's different everytime. Sometimes, I feel like throwing in some olives, sometimes not. Sometimes it's a bit sweeter, and sometimes a bit richer. In any case, I usually start it off with an onion, which I caramelize in the pot. I then add everything else all at once: ground beef that I pre-cook with salt, pepper, garlic, ginger (yes, ginger - you don't taste the ginger...but you definitely notice if it's not there!), basil and oregano, a dollop of tomato paste and a huge can of crushed tomatoes, brown sugar and vinegar and a schwack of fresh basil if you have it. This time, I also added a handful of chopped up olives.
For the bechamel sauce, it's as simple as a quarter cup of each flour and butter, which I cook on the stove until light golden and then a splash of milk to get your desired consistency. Traditionally a bechamel has nutmeg and a few other spices, but the red sauce was so strong in flavour, I left it unseasoned, and it did exactly what I wanted it to do: added a creamy layer to the lasagna, which melded perfectly with the red sauce.
And then, all it was was layering the lasagna starting off with red sauce, followed by pasta, more red sauce, bechamel and cheese and then pasta again. I did three layers, finishing off with just red sauce and cheese!

For the salad, use any vegetables and greens you like. I just went with lettuce, tomatoes and olives: go simple, because it's all about the warm, balsamic vinaigrette.
For the dressing, dice up half an onion as small as you can manage and slice a garlic clove and sautee them in olive oil until caramelized. When you reach this stage, pull the pan off the heat, and add a generous splash of balsamic vinegar. I usually put it back on the stove on low at this point, just to bring everything together and add salt and and a generous amount of black pepper to taste. Let the dressing cool a bit and then toss with the salad before serving. Make sure that when you add the balsamic vinegar, though, not to inhale the fumes! The vinegar is really pungent. You'll thank me later!
The onions and garlic absorb all the vinegar and melt into the dressing - it's divine. If you try anything from this blog post, please try the dressing!

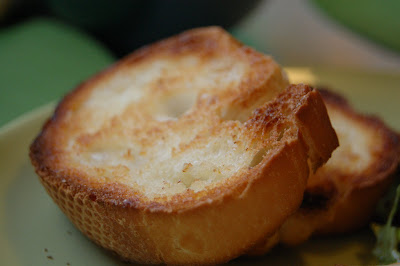
Finally, the easiest garlic bread you'll ever make: and the tastiest. Just toast slices of baguette in the oven (or even the toaster) and while still warm, rub a raw garlic clove over them. The crusty bread breaks down the garlic and the bread gets a hint of garlic aroma and taste, without being overpowered. If you toast them in the oven, I like to spread some butter on one side. If you do them in the toaster, just rub the garlic on them when they come out, and then you can spread some butter on top.
And that's all she wrote, folks! I hope you'll try at least some of these recipes! And I hope the change of pace from baking was welcome!
Till soon!
Happy eating!
Thursday, April 29, 2010
Walnut, Chocolate Chip, Spice Blondies and Masala Chai!
Last post of the day! And this one is dedicated to Sabera of One Life to Eat (on my "Sweet Blogs" list) and one of my very best friends, Kendall.

My poor sister is sick: so instead of the traditional soup or tea or whatever, I decided to do for her what I do best: bake! I asked her what she felt like and she picked these blondies! I've never made blondies before, and let me tell ya, I have no idea why. They are from Cakes and Bakes, a very thoughtful Christmas gift from Kendall. This book is awesome. The recipes are quick and easy for the most part and heartwarming, to boot.
I did make a few modifications to the recipe, though. I am not a huge fan of self-rising flour. It's more expensive than regular, all-purpose flour, and it it's not called for in very many of the recipes I use. However, I have noticed that in a lot of the new cookbooks I have gotten as gifts, many of them are calling for it. I tried a conversion where you take regular all-purpose flour and add baking soda and salt. Needless to say, whatever I made with that conversion just wasn't quite right. It always tasted salty and baking soda-ey. So for this recipe, it called for a cup of self-rising flour and I thought, why not try just adding a teaspoon of baking powder to all-purpose flour? Well, it worked! These blondies turned out fantastic! I'm still going to try a few more recipes with my own sneaky little conversion and I will definitely let you know when I'm sure it works! I also added chocolate chips and nutmeg to the blondies (they originally just called for cinnamon) and they were a hit in my house!
I have been on the quest for the perfect cup of masala chai for a few years now. I had some amazing chai in London at my aunt's house but the mix she used was a homemade gift. I tried to emulate those flavours in my own version but somehow, the chai was never perfectly satisfying. Then, Sabera came along with her recipe, which I tried out this morning and it was exactly what I was looking for: super simple, and absolutely soul-satisfying.
Please, please, please try out this masala chai recipe! You won't taste a better cup, unless you go to India to get it! I didn't have the specific tea she mentions so I just used my orange pekoe, and for every one mug of chai, because I didn't have fresh ginger, I added 1/2 teaspoon of powdered ginger and a splash of vanilla extract instead of a vanilla bean, which I rarely have kicking around! If you have all the authentic ingredients, though, use those!...I intend to go out and get them and give it another go!
That's all for now, folks!
Happy eating!
Cakes Cakes Cakes!
 Hello Foodies!
Some of you may remember my venture into Cake City a long time ago and how overwhelming I found it – fondant and buttercream and decorating - oh my! Well, I think that since then, I have come very far - or shall I say we, my mother and sister included! I feel like the fondant covering on the cakes has gone leaps and bounds from before! What say you?
This is one of the cakes we made for Darbari. It is a dark chocolate cake with mint-chocolate-pieces baked right
into the batter. The cream in between is just a vanilla buttercream - the cake was pretty rich in flavour, so we thought that a simple buttercream would let the mint-chocolate really shine through. The cake was then covered with fondant and decorated with a mehndi design! It was a total hit!

This second concoction (last picture shown) was made for another Darbari. The theme the girls were going to be wearing was coral, so we did our best to try and incorporate that into the cake we made. We coloured the fondant for the flowers a sort of coral pink.
Some of your may remember the triple-layer, rectangular cake from a previous post that was covered with light pink cherry blossoms...since then, we got a bigger flower plunger so this cake has big and small flowers...I think it makes it look a bit less sparse and just a touch more dramatic.
With such a fresh, springy look to this cake, we thought it fit that the inside match the outside. The cake is an orange sponge with cranberries thrown in the mix, and in between the
 layers is an orange buttercream.
The cake had such a lovely, fresh smell when it came out of the oven, that we baked a half batch of cupcakes for us to try - absolutely scrumptious for those times you don't feel like something super heavy. They went perfectly with a cup of orange pekoe!
A tip regarding cranberries, if you happen to find them on sale, buy a couple of bags and freeze them - then you can just pull them out whenever you want to make a fresh addition to a cake, or anything really! They keep really well in the freezer if you remember to close the bag well when you're done! Just give the frozen berries a rinse before you use them and that'll thaw them right out!
I've got one more post in me for today, so later, gators!
Subscribe to:
Posts (Atom)

